Creating an Environment#
In this tutorial, we show how to initialize a custom environment with four movers of different sizes. For this and all the following tutorials, we assume that MagBotSim and all required dependencies are installed. If you have not yet installed MagBotSim, please refer to Installation & License for more information.
Getting Started#
First, we need to create a file for our custom environment. Navigate to the directory where your environment file should be
located and create a new file called panda_box_env.py.
Initializing the Environment#
The next step is to decide which MagBotSim parent class is required (see Choosing a Parent Class for Your Custom Environment for more information).
To keep our example environment simple, we do not use RL. Thus, we choose the BasicMagBotEnv as the parent class.
Write the following code in panda_box_env.py:
import numpy as np
import mujoco

from magbotsim import BasicMagBotEnv, MoverImpedanceController
from magbotsim.utils import mujoco_utils


class PandaBoxExampleEnv(BasicMagBotEnv):

    def __init__(self, initial_panda_qpos_dict: dict | None = None) -> None:
        # mover parameters, collision parameters and initial start positions
        mover_mass = np.array([1.264, 0.639, 0.639, 3.424])
        bumper_mass = np.array([0.05, 0.034, 0.034, 0.01])
        mover_params = {
            'shape': 'mesh',
            'mesh': {
                'mover_stl_path': [
                    'beckhoff_apm4330_mover',
                    'beckhoff_apm4220_mover',
                    'beckhoff_apm4220_mover',
                    'beckhoff_apm4550_mover',
                ],
                'bumper_stl_path': [
                    'beckhoff_apm4330_bumper',
                    'beckhoff_apm4220_bumper',
                    'beckhoff_apm4220_bumper',
                    'beckhoff_apm4550_bumper',
                ],
            },
            'mass': mover_mass - bumper_mass,
            'bumper_mass': bumper_mass,
        }
        # we model the mover as a simple 2D box to check collisions
        # since we are using Beckhoff XPlanar movers in this example, we
        # use the sizes specified in the technical drawings plus a safety margin
        collision_params = {
            'shape': 'box',
            'size': np.array([
                [0.155 / 2, 0.155 / 2],
                [0.113 / 2, 0.113 / 2],
                [0.113 / 2, 0.113 / 2],
                [0.235 / 2, 0.235 / 2],
            ]) + 0.001
        }
        self.initial_mover_start_xy_pos = np.array(
            [
                [0.55, 0.48],
                [0.124, 0.126],
                [0.8, 0.23],
                [0.3, 0.7],
            ]
        )
        self.initial_mover_z_pos = 0.002
        # init BasicMagBotEnv
        super().__init__(
            layout_tiles=np.ones((4, 4)),
            num_movers=4,
            mover_params=mover_params,
            initial_mover_zpos=self.initial_mover_z_pos,
            table_height=0.2,
            collision_params=collision_params,
            initial_mover_start_xy_pos=self.initial_mover_start_xy_pos,
            custom_model_xml_strings=None,
            use_mj_passive_viewer=True,
        )
        # remember initial mover positions and orientations
        self.initial_mover_xyz_pos = np.zeros((self.num_movers, 3))
        self.initial_mover_xyz_pos[:,:2] = self.initial_mover_start_xy_pos
        self.initial_mover_xyz_pos[:,-1] = self.initial_mover_z_pos
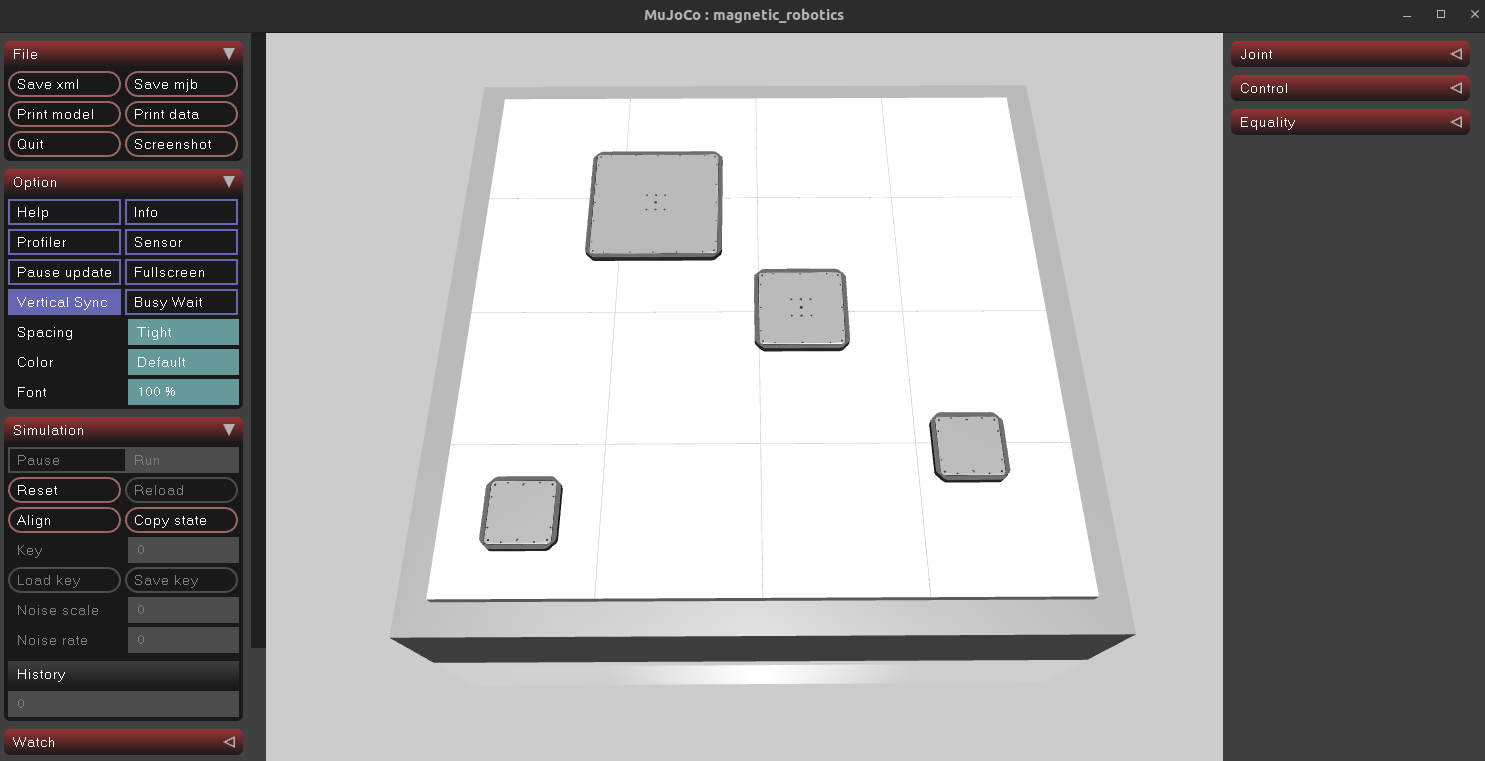
We now initialized a custom environment called PandaBoxExampleEnvironment which inherits from the BasicMagBotSimEnv.
Additionally, we added 16 tiles by specifying a 4x4 tile layout and four movers to the environment, and set a start position
for each of these movers. Note that all movers have different shapes, since for each mover a mesh file and collision parameters
are specified. We use mesh files and tile parameters (default configuration, not changed in this example) for the XPlanar
system by Beckhoff Automation, but MagBotSim can be configured to simulate other MagLev systems on the market simply by
specifying other mesh files or tile parameters.
You can now already render your environment to see what it looks like. To this end, add a new file render_panda_box_env.py
to your directory where panda_box_env.py is located, write the following code and run the script to render the environment:
from panda_box_env import PandaBoxExampleEnv

# init environment
env = PandaBoxExampleEnv()

# render environment
env.render()
try:
    while True:
        pass
except KeyboardInterrupt:
    pass
env.close()
Note
On macOS, MuJoCo’s passive viewer requires that the script is executed using the mjpython launcher, i.e. run
mjpython render_panda_box.py.
You should now see MuJoCo’s passive viewer and the following environment with four movers:
In the next tutorial Customizing the MuJoCo Model, we show how to add robots and other objects to the environment by customizing the MuJoCo model.